
Installing a roof is a critical task that requires careful planning, the right materials, and meticulous execution. Whether you’re tackling a small project or replacing the roofing on your home, this guide provides a clear breakdown of the essential steps involved. Proper preparation and adherence to safety standards are essential for success.
Step 1: Prepare Your Workspace
Before starting any roofing project, ensure your workspace is safe and organized.
– Inspect the structure: Check for any damage to the underlying framework that might need repairing before installing the new roof.
– Gather tools and materials: Common tools include a roofing nail gun, utility knife, ladder, safety harness, chalk line, tape measure, and hammer. Materials might include shingles, underlayment, flashing, nails, and sealant.
– Establish safety measures: Wear non-slip shoes and use fall protection equipment like harnesses when working on elevated surfaces.
Step 2: Remove Old Roofing
Removing old roofing is necessary to properly install new materials.
– Begin by stripping away existing shingles or tiles using a roofing shovel or pry bar.
– Safely dispose of debris in a dumpster or designated waste area to maintain an organized worksite.
– Inspect the roof decking beneath for signs of rot or water damage; repair any compromised sections immediately.
Step 3: Install Underlayment
Underlayment acts as a moisture barrier between the decking and shingles. Follow these steps:
1. Roll out underlayment horizontally across the decking starting at the eaves (bottom edge). Overlap sections by at least 2 inches for proper coverage. 2. Secure it with staples or nails placed approximately every 12 inches. 3. Ensure valleys (where two roof planes meet) have an extra layer of protection with self-adhering waterproof membrane.
Step 4: Apply Flashing Around Vulnerable Areas
Flashing prevents water from entering through gaps around chimneys, vents, skylights, and edges of your roof:
– Use metal flashing panels around these areas. – Nail down flashing securely and seal edges with roofing caulk to prevent leaks.
Step 5: Lay Roofing Shingles or Material
Installing shingles requires precision to ensure durability and longevity: 1. Begin at the bottom edge of your roofline (eaves) with starter strips. 2. Lay asphalt shingles row by row in staggered formation to avoid alignment issues. 3. Use galvanized nails driven into pre-marked nail lines on each shingle while maintaining consistent spacing.
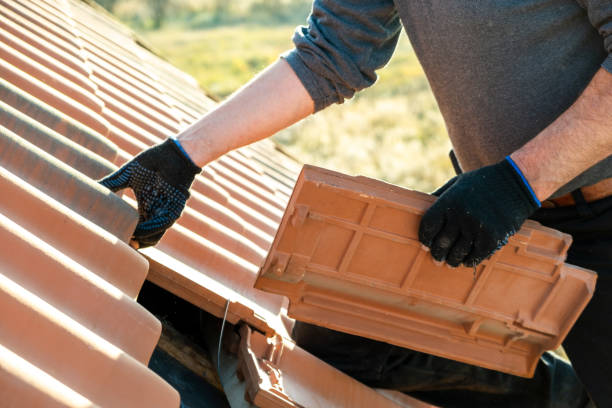
For other materials like tiles or metal sheets: – Follow manufacturer-specific installation guidelines carefully for proper alignment.
Step 6: Seal Ridge Caps
Ridge caps cover the peak of your roof where two slopes meet: – Cut specific ridge cap pieces from regular asphalt shingles or purchase pre-shaped caps. – Arrange them along ridges perpendicular to other rows; secure with nails covered by overlapping caps.
Key Tips for Beginners
To make your first roofing project seamless: – Measure accurately before purchasing materials—overestimating is better than running out mid-project. – Work during dry weather conditions to reduce risks associated with slips on wet surfaces. – Avoid rushing; allocating extra time ensures attention to detail throughout every stage.
| Tools Needed | Materials Required |
| Ladder | Shingles |
| Safety Harness | Underlayment |
| Utility Knife | Flashing |
| Chalk Line | Nails |
Roof installation may seem daunting at first glance but breaking it down into manageable steps simplifies even complex projects significantly when approached methodically using proper techniques above
Essential Tips for Hiring a Minneapolis MN Roofing Contractor for Your Home
Finding the right roofing contractor can be a daunting task, especially if you’re unfamiliar with the process. Hiring an experienced and reliable professional is essential to ensure your roofing project is completed efficiently and to a high standard. Below, we provide expert advice to guide you through the process of selecting the right contractor for your home.
1. Research and Verify Credentials
- Check for Licensing: Make sure the contractor is licensed to operate in your state or region.
- Verify Insurance: Ensure they have both liability insurance and worker’s compensation coverage to protect you from potential accidents or damages.
- Ask for Certifications: Look for certifications from reputable organizations like GAF, CertainTeed, or Owens Corning, which indicate that the contractor has undergone specialized training.
A reputable contractor should have no problem providing proof of these credentials.
2. Evaluate Experience and Expertise
- Years in Business: Contractors who have been in business for several years are often more reliable.
- Specialization: Ask if they specialize in specific types of roofs (e.g., asphalt shingles, metal roofs, flat roofs).
- Portfolio of Past Work: Request photos or references from previous projects to evaluate their craftsmanship.
3. Read Reviews and Get References
- Online Reviews: Check platforms such as Google, Yelp, or Better Business Bureau (BBB) for unbiased feedback.
- Ask for References: Speak directly with past clients about their experience with the contractor.
- Look Out for Red Flags: Be cautious of consistent complaints about missed deadlines or subpar workmanship.
4. Get Multiple Quotes
| Aspect | Questions to Ask |
| Pricing | Is this an itemized estimate? Are there hidden fees? |
| Materials | What type of materials will be used? Do they come with warranties? |
| Timeline | How long will the project take? What’s the start date? |
Avoid choosing a contractor solely based on price; instead, focus on value and quality.
5. Pay Attention to Communication
- Are they responsive and easy to reach?
- Do they listen carefully to your concerns?
- Are they transparent about costs, timelines, and processes?
Clear communication ensures fewer misunderstandings throughout your roofing project.
6. Review Contracts Carefully
- Scope of work
- Project timeline
- Payment terms
- Warranty information
Review every section thoroughly before signing; if anything seems unclear or incomplete, ask questions until you’re satisfied.
Selecting a professional roofing contractor requires time and research but pays off by ensuring your roof is installed or repaired correctly. By following these expert tips—researching credentials, evaluating experience, checking reviews, gathering multiple quotes—you’ll be well-equipped to choose a qualified professional who meets your needs effectively while safeguarding one of your most important investments—your home’s roof!
Expert Advice on Hiring a Minneapolis MN Roofing Contractor for Your Home
Hiring the right roofing contractor is a crucial step to ensure your home’s roof is durable, functional, and aesthetically pleasing. Whether you’re replacing an old roof or installing a new one, selecting a qualified professional can save you time, money, and future headaches. Here’s a comprehensive guide to help you make an informed decision.
Why Hiring the Right Roofing Contractor Matters
- You safeguard your investment.
- You reduce the risk of costly repairs later.
- You gain access to expert advice on materials and techniques.
Key Factors to Consider When Selecting a Roofing Contractor
- Look for contractors with at least 5–10 years of experience in residential roofing projects.
- Check if they specialize in the type of roof you need (e.g., asphalt shingles, metal roofing).
- Verify that they hold valid contractor licenses as per local regulations.
- Ensure they have liability insurance and workers’ compensation coverage to protect you from potential liabilities.
- Research online reviews on platforms like Google or Yelp.
- Ask for references from previous clients to assess their reliability and quality of work.
- Request written estimates detailing labor costs, material costs, timelines, and warranty information.
- Avoid contractors who offer vague or unusually low quotes compared to others in your area.
- Inquire about warranties offered on both labor and materials.
- A reputable contractor should provide warranties that reflect their confidence in their work.
Questions to Ask Potential Roofing Contractors
- How long have you been in business? Can I see examples of past projects?
- What type of materials do you recommend for my project? Why?
- Do you provide written contracts outlining all terms?
- What is your plan for debris removal once the job is complete?
Warning Signs of Untrustworthy Contractors
| Red Flag | Why It’s Concerning |
| Lack of license | Indicates non-compliance with local laws |
| No physical address | Makes it harder to track them if issues arise |
| High-pressure tactics | Pushes you into quick decisions |
| Cash-only payments | Suggests lack of transparency |
Benefits of Hiring Professionals vs. DIY Roofing
- Access to high-quality tools and materials unavailable at retail stores.
- Compliance with safety measures designed for complex projects like roofing.
- Faster turnaround times due to expertise in efficient installation methods.
Taking time to evaluate contractors thoroughly can pay off significantly by ensuring peace of mind throughout your roofing project lifecycle. Always prioritize professionalism over haste when making this important decision.
Expert Tips for Minneapolis MN Roof Replacement and Durable Shingle Installation
Shingles are one of the most popular roofing materials due to their durability, affordability, and aesthetic appeal. Proper shingle installation is essential to ensure the longevity of your roof and protect your home against weather elements. This guide will walk you through everything you need to know about shingle installation, from preparation to final steps.
Benefits of Shingles
- Affordable: Shingles are cost-effective compared to materials like metal or tile roofing.
- Variety: Available in a wide range of colors, styles, and textures to suit any architectural design.
- Durability: High-quality shingles can last 20–50 years depending on the type (asphalt, wood shake, or composite).
- Ease of Installation: Compared to other materials, shingles are relatively simple to install or replace.
Materials and Tools Needed for Shingle Installation
Materials:
– Asphalt shingles (or another shingle type of your choice)
– Roofing underlayment (felt paper or synthetic underlayment)
– Roofing nails (appropriate size for your shingle material)
– Drip edge flashing
Tools:
– Roofing hammer or nail gun
– Utility knife for cutting shingles
– Chalk line for straight guidelines
– Ladder with stabilizer attachment
– Safety gear (harness, gloves, non-slip shoes)
Step-by-Step Process for Installing Shingles
- Remove any old roofing material completely. Inspect the decking underneath for signs of damage.
- Install a moisture barrier or underlayment over the entire roof surface. This provides additional waterproofing.
- Attach the drip edge along all edges of the roof. This ensures water runoff doesn’t penetrate under the roofline.
- Install starter strip shingles at the bottom edge of your roof as a base layer that overlaps slightly past the drip edge.
- Begin laying full rows of shingles from bottom to top.
- Use chalk lines as guides to ensure rows remain straight.
- Nail each shingle securely using four nails per shingle or per manufacturer guidelines.
- Offset each successive row by half a tab length from the previous row to create a staggered effect that prevents leaks.
- At roof edges and ridges, measure carefully before cutting excess material with a utility knife.
- Cap off ridge vents or hips with specially designed ridge cap shingles for added protection against wind-driven rain.
Common Mistakes To Avoid During Installation
| Mistake | Consequence | Solution |
| Improper nail placement | Leads to loose shingles | Follow manufacturer nail guides |
| Skipping starter strips | Water seeping underneath layers | Always install starter strips |
| Uneven rows | Reduces curb appeal | Use chalk lines |
Maintenance Tips for Long-lasting Performance
- Inspect your roof annually for damaged or missing shingles.
- Clean gutters regularly to prevent water backup.
- Trim overhanging branches that could damage shingles in winds.
- Address small issues promptly before they escalate into major repairs.
By following this guide closely and avoiding common mistakes during installation, you’ll achieve durable results while keeping repair costs minimal over time.

Benefits and Installation Tips for Minneapolis MN Roof Repair Using Membrane Roofing
Membrane roofing is a popular choice for both residential and commercial applications due to its durability, energy efficiency, and adaptability to various building types. If you’re considering membrane roofing for your property, it’s essential to understand its advantages, the installation process, and factors to weigh before making a decision. This guide will provide insights into membrane roofing to help you make an informed choice.
Benefits of Membrane Roofing
- Weather Resistance: Membrane roofs are highly resistant to extreme weather conditions such as rain, snow, and UV radiation.
- Energy Efficiency: Many membrane materials are designed with reflective properties that reduce heat absorption and lower cooling costs in warmer climates.
- Durability: Properly installed membrane roofs can last 20–30 years or more with minimal maintenance.
- Flexibility: These roofs can be installed on flat or low-sloped surfaces without compromising performance.
- Waterproofing: The seamless design of membranes prevents water leaks and ensures effective drainage.
Types of Membrane Roofing
| Type | Description | Ideal Use Cases |
| EPDM (Ethylene Propylene Diene Monomer) | Synthetic rubber material; durable & cost-effective | Residential and commercial flat roofs |
| TPO (Thermoplastic Polyolefin) | Single-ply reflective material; energy-efficient | Energy-conscious buildings |
| PVC (Polyvinyl Chloride) | Flame-resistant & chemical-resistant | Industrial buildings with exposure risks |
| Modified Bitumen | Asphalt-based layered system | Budget-friendly roofing for smaller projects |
Steps for Installing Membrane Roofing
- Clean the roof deck thoroughly to remove debris or dirt.
- Inspect for any structural damages that need repair before installation.
- Lay down an appropriate insulation layer for improved thermal performance.
- Secure the insulation board using fasteners or adhesive.
- Position the membrane carefully across the surface.
- Allow sufficient overlap at seams to ensure watertight sealing.
- Use adhesive bonding or mechanical fasteners based on project requirements.
- Pay close attention to edges, corners, and penetrations such as vents or drains.
- Weld seams using heat-welding equipment or compatible sealants.
- Check for uniform sealing along all joints.
- Conduct a thorough inspection to identify potential issues like air bubbles or improper adhesion.
- Perform water testing if necessary.
Key Considerations When Choosing Membrane Roofing
- Budget Constraints: Determine which type fits within your financial plan while providing desired benefits.
- Climate Conditions: Choose materials suitable for specific regional weather patterns (e.g., UV resistance in sunny areas).
- Building Design: Verify compatibility with your building’s structural layout (flat vs sloped roofs).
- Maintenance Requirements: Understand cleaning schedules and potential repair costs over time.
Maintaining Your Membrane Roof
- Conduct routine inspections twice a year or after severe weather events.
- Keep drainage systems clear to prevent pooling water on flat surfaces.
- Address minor damage promptly before it escalates into costly repairs.
By exploring all aspects of membrane roofing—from benefits to installation methods—you can ensure this versatile solution meets both short-term needs and long-term goals effectively.
Top Tips and Tricks for a Flawless Minneapolis MN Roof Installation with Professional Results
Ensuring a roofing project goes smoothly and delivers professional results requires careful planning, attention to detail, and expert knowledge. Whether you’re a homeowner overseeing the work or a contractor managing the process, following these essential tips can make all the difference.
1. Plan Ahead by Assessing Your Roofing Needs
- Type of repair or replacement: Are you replacing shingles, fixing leaks, or installing a new roof entirely?
- Roof material preferences: Asphalt shingles, metal roofing, tile, or membrane?
- Roof size and pitch: Calculate dimensions to estimate costs more accurately.
- Weather conditions: Plan around favorable weather to avoid unexpected delays.
Proper assessment at the beginning helps prevent mid-project surprises and ensures everything runs smoothly.
2. Invest in Quality Materials
| Material Type | Durability Rating | Maintenance Needs |
| Asphalt Shingles | Moderate (20–30 years) | Low |
| Metal Roofing | High (40–70 years) | Low |
| Clay Tiles | Very High (50+ years) | Moderate |
| EPDM Membrane | Moderate (20–25 years) | Minimal |
Consult with suppliers and contractors about which materials best suit your roof’s specific needs.
3. Hire Experienced Professionals
- Check licenses and insurance.
- Request references for past projects.
- Verify their experience with your chosen roofing material.
- Review warranties for both labor and materials.
An experienced contractor ensures that work complies with safety standards while delivering high-quality craftsmanship.
4. Prioritize Proper Ventilation
- Install ridge vents at the peak of the roof.
- Incorporate soffit vents for consistent airflow from lower roof areas upward.
- Ensure there’s no blockage of vents during installation.
Good ventilation extends the life span of the roof and improves energy efficiency in your home.
5. Inspect Work Thoroughly During Installation
- Proper underlayment installation before adding outer layers.
- Straight alignment of shingles, ensuring no gaps are left exposed.
- Secure flashing around chimneys, skylights, and vents.
Addressing issues during installation prevents costly fixes later on.
6. Maintain Safety Standards Throughout
For Homeowners Monitoring Work: – Keep children or pets away from work areas.
For Contractors or DIY Installers: – Wear proper safety gear such as harnesses and non-slip boots. – Use stable ladders approved for construction use.
Mitigating risks safeguards everyone involved and keeps delays at bay.
By following these tips and collaborating closely with skilled professionals when necessary, you’ll achieve flawless results while ensuring durability for years ahead.
- Step-By-Step Guide to Choosing the Best Minneapolis MN Roofing Contractor for Your Roof Installation
- Step-by-Step Guide for Beginners from a Trusted Minneapolis Roofer
- Step-by-Step Guide to Roof Installation by a Trusted Minneapolis Roofer
- Essential Tips for Minneapolis MN Roof Replacement with Solar Panels
- What Minneapolis MN Roofing Contractor Experts Want You to Know Before Installing a New Roof
- A Minneapolis Roofer’s Guide to Installing Roof Shingles for Homeowners
- Identifying When to Call a Minneapolis Roofer for Repairs or Replacement
- What Is Included in a Comprehensive Minneapolis MN Roof Replacement Process