When it comes to roof installation, understanding the process is key to ensuring a durable and long-lasting result. Whether you’re building a new home or replacing an old roof, following a well-defined approach can save time, money, and effort. Here’s a detailed guide that breaks down the steps of the roof installation process.
Step 1: Planning and Preparation
Before any physical work begins, proper planning is essential. This includes:
– Budgeting: Determine how much you’re willing to spend on materials and labor.
– Material Selection: Choose appropriate roofing materials based on your budget, climate, and aesthetic preferences.
– Inspection: Assess the structure of your home to ensure it can support the new roof.
Step 2: Removing the Old Roof
If you’re replacing an existing roof, removal is necessary before installing the new one. Here’s how this step is handled:
1. Safety First – Wear protective gear such as gloves, goggles, and sturdy footwear. Use fall protection equipment when working at heights.
2. Tear-Off Process – Start by removing old shingles or tiles using a roofing shovel or scraper tool. Work in manageable sections to stay organized.
3. Inspect Decking – Once the old material is removed, inspect the decking (roof base) for signs of rot or damage.
Step 3: Installing Drip Edge and Underlayment
The drip edge and underlayment are critical components of any roofing project as they enhance waterproofing and extend roof life: – Apply drip edge along edges of the roof to prevent water damage. – Lay down underlayment (e.g., felt paper or synthetic sheets) over decking for moisture protection.
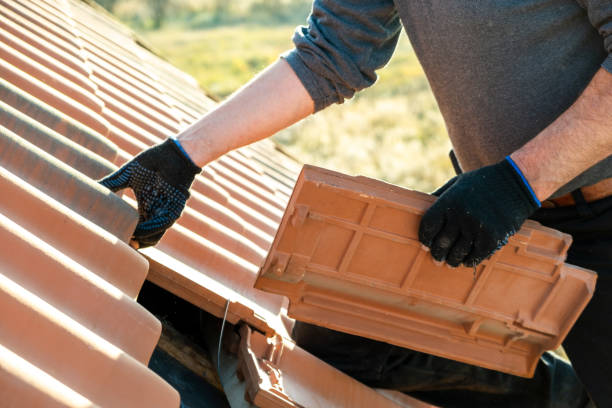
Step 4: Laying Roofing Material
This step varies depending on your chosen material: | Type of Roofing Material | Installation Notes | Lifespan | |—————————|——————–|———-| | Asphalt Shingles | Overlap each row with nails at proper intervals.| 15–30 years | | Metal Panels | Secure panels with screws; ensure tight seams.| 40–70 years | | Clay Tiles | Install on batten strips; handle carefully due to fragility.| 50+ years |
Regardless of material type: 1 .Begin from bottom edges upwards.
Tools Every Minneapolis Roofer Needs for a Successful Roof Installation
When embarking on a roofing installation project, having the right tools is essential to ensure efficiency, safety, and precision. Whether you’re a professional roofer or a DIY enthusiast, investing in high-quality tools can make the process smoother and help you achieve long-lasting results. Below is an overview of the essential tools required for a successful roof installation.
Essential Hand Tools for Minneapolis MN Roof Replacement
Hand tools are the foundation of any roofing project. These are some of the must-have hand tools:
– Roofing Hammer or Hatchet
– A versatile tool used for nailing shingles, cutting them to size, and removing old nails or fasteners.
– Utility Knife
– Essential for cutting shingles, underlayment, and other materials. Opt for one with replaceable blades for convenience.
– Chalk Line
– Helps create straight guidelines on the roof to ensure proper alignment during shingle placement.
– Pry Bar or Roofing Tear-Off Bar
– Used to remove old shingles, nails, and debris during roof removal or repair tasks.
– Tape Measure
– Crucial for measuring areas accurately when laying out materials or planning cuts.
Essential Safety Equipment for Minneapolis MN Roof Repair
Roofing work often involves heights and steep slopes, making safety equipment non-negotiable:
– Roof Harness System
– Includes harnesses and lanyards designed to secure workers when working at elevated heights. Essential for preventing falls.
– Roof Brackets
– These provide stable footing when working on steeply pitched roofs by creating temporary platforms. – Safety Glasses & Gloves
– Protects your eyes from debris and your hands from sharp objects or splinters. – Hard Hats
– Provides head protection from falling objects like tools or materials.
Top Tools for Minneapolis MN Roof Installation
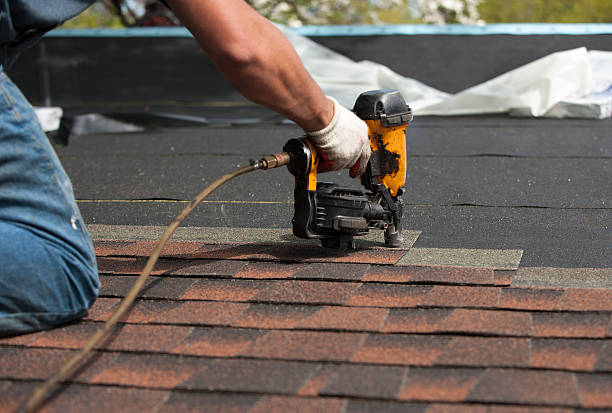
Power tools save time and energy on labor-intensive roofing tasks: – Cordless Drill/Driver – Ideal for driving screws into metal panels or installing fasteners efficiently. – Nail Gun – Speeds up the process of nailing shingles compared to manual hammering. – Circular Saw – Perfect for cutting thicker materials like plywood decking.
Measuring & Layout Tools
Accuracy in measuring ensures that your roof has proper alignment and fit: | Tool Name | Purpose | |———————|———————————————–| | Laser Level | Ensures even slopes and straight lines | | Speed Square | Helps achieve precise angles & measurements | | Measuring Wheel | Useful for calculating large surface areas |
Specialized Roofing Tools
There are also niche tools that streamline specific tasks in roofing:
1. Shingle Cutter – Designed specifically for trimming asphalt shingles neatly without damaging their edges.
2. Magnetic Sweeper – Collects stray nails and metal debris after installation work is completed. 3. Caulking Gun: For applying sealants around vents & chimneys effectively ensuring watertight seals .
Using these essential items improves outcomes dramatically resulting long-lasting installs .
Essential Tools Required for a Successful Roof Installation
Roof installation is a complex process that demands precision, skill, and the right tools. Whether you’re a professional roofer or a homeowner undertaking this project yourself, having the appropriate equipment is essential to ensure efficiency and high-quality results. Below is a breakdown of tools necessary for a successful roof installation, categorized by their purpose in the process.
Safety Equipment
- Harnesses and Lanyards: Prevent falls by securing workers to an anchor point.
- Roof Brackets: Create secure footing on steep roofs.
- Hard Hats: Protect against head injuries from falling objects or slips.
- Safety Glasses: Shield eyes from flying debris during cutting or nailing tasks.
- Work Gloves: Offer protection from sharp materials like nails, shingles, or metal flashing.
Measuring and Layout Tools
Accuracy is critical when installing roofing materials. Reliable measuring tools will help ensure proper cuts and alignment.
- Tape Measure: Used to measure distances for accurate placement of shingles and components.
- Chalk Line Tool: Helps create straight lines for uniform shingle placement.
- Speed Square: Assists in making precise cuts on roofing materials.
- Laser Level: Ensures proper alignment and slope calculations.
Cutting Tools
Cutting materials like shingles or underlayment requires specialized tools designed to handle tough surfaces.
- Utility Knife with Hook Blades: Ideal for cutting asphalt shingles cleanly.
- Tin Snips: Used for cutting through metal flashing or gutters.
- Circular Saw or Reciprocating Saw: Suitable for removing old roofing materials like wood sheathing when necessary.
Fastening Tools
Properly securing roofing components ensures strength and durability over time.
- Roofing Nail Gun: Speeds up the process of securing shingles while ensuring nails are driven in accurately.
- Consider coil nailers designed specifically for roofing work.
- Use compatible nails with corrosion resistance to maximize longevity.
- Hammer: A manual backup tool that’s essential for fastening tasks where precision is needed.
- Staple Gun (Manual or Electric): Useful for attaching underlayment sheets firmly to the decking surface.
Material Handling Tools
Efficiently moving heavy bundles of shingles and other materials can save time while reducing strain on workers.
| Tool | Purpose |
| Roofing Conveyor | Elevates materials directly onto the roof |
| Roofing Shovel | Removes debris during tear-off phase |
| Shingle Lifter | Assists in positioning heavy shingle packs |
Other Essential Items
- Magnetic Sweeper – Collect stray nails after tearing off old roofing material.
- Caulking Gun – Used for applying sealants around vents, chimneys, or flashing areas.
- Broom or Blower – Cleans surfaces to prepare them before applying new layers of material.
Tips For Selecting Quality Roofing Tools
When investing in roofing tools, consider these aspects: 1. Quality over price – High-quality tools may cost more but last longer. 2. Ergonomic design – Look for lightweight options that reduce physical strain during extended use. 3. Compatibility – Ensure your nail guns, fasteners, or other equipment work well with chosen roofing materials.
Having access to these tools will significantly improve efficiency during roof installation projects while ensuring safe practices are upheld throughout the process.
The Importance of Installing Drip Edge and Underlayment in Roofing Projects
Proper installation of drip edge and underlayment is essential for the longevity and efficiency of your roof. These components work together to protect your home from water damage, prevent structural issues, and improve the overall performance of your roofing system. Below, we discuss their importance and how they contribute to a durable roof.
What is Drip Edge in Roofing?
Drip edge is a metal flashing installed at the edges of your roof. It plays a key role in directing water away from your home’s fascia board and into the gutter system. Without a drip edge, water can seep into the fascia or even behind the gutters, leading to potential damage.
- Protects Fascia Boards: Drip edges prevent water from running down behind gutters which reduces rot risk for fascia boards.
- Improves Gutter Functionality: By guiding water directly into gutters, drip edges minimize overflows during heavy rain.
- Prevents Roof Deck Damage: They help avoid moisture infiltration at the roof’s edge, protecting the underlying decking structure.
- Enhances Curb Appeal: Metal drip edges give a clean finish to roofing installations, contributing to an aesthetically pleasing appearance.
What is Underlayment in Roofing?
Roofing underlayment refers to a protective layer placed directly on top of the roof deck but beneath roofing materials like shingles or tiles. It serves as an additional barrier against moisture penetration and provides secondary protection if shingles are damaged.
| Type | Description | Best Use Cases |
| Asphalt-Saturated | Traditional felt material that is infused with asphalt for added durability. | Suitable for most residential roofs |
| Synthetic | Lightweight material offering superior tear resistance and waterproofing | High-performance or steep-slope roofs |
| Rubberized Asphalt | Self-adhering underlayment featuring waterproof properties | Areas prone to ice dams or heavy rainfall |
- Water Resistance: Prevents leaks caused by wind-driven rain or ice dams.
- Protection During Installation: Shields the roof deck from weather exposure before shingles are installed.
- Fire Resistance: Many modern underlayments provide fire-resistant properties for added safety.
- Durability Against Extreme Weather: Acts as an extra barrier against severe weather conditions like storms or snow accumulation.
Why Are These Components Crucial?
- Prevent Moisture Problems
Homes without proper drip edge flashing or underlayment often face issues such as mold growth, wood rot, and leaks over time. - Extend Roof Lifespan
The additional protection these materials provide helps delay wear-and-tear on other roofing components like shingles or tiles. - Comply with Building Codes
Many local building codes require these materials during roof installation because they align with industry standards for quality construction. - Save on Repairs
Investing in quality installation upfront can reduce long-term repair costs associated with water damage or premature deterioration.
Installation Tips
- Ensure that the drip edge overlaps properly at joints and extends slightly outward past gutter edges.
- Place synthetic or asphalt-saturated underlayments flat without wrinkles to avoid weak spots.
- For rubberized asphalt options, use them specifically in vulnerable areas such as valleys or eaves prone to ice damming.
- Always follow manufacturer guidelines for fastening methods (staples vs nails) based on material type.
By understanding their importance and following best practices during installation, you can ensure these components provide robust protection for years ahead while maintaining high-quality performance throughout various climates.
The Importance of Installing Drip Edge and Underlayment in Roofing Projects
Proper roof installation involves more than just laying shingles or tiles. Two critical components that often go unnoticed are the drip edge and underlayment. These elements play an essential role in protecting your home from water damage, improving roof durability, and ensuring optimal performance over time.
What is a Drip Edge?
A drip edge is a metal flashing installed at the edges of the roof to direct water away from the fascia and prevent it from seeping into underlying structures. It acts as a barrier against moisture intrusion, which can lead to wood rot and structural damage.
- Prevents Water Damage: Guides rainwater into the gutters, reducing the risk of pooling or seepage.
- Enhances Roof Longevity: Protects the edges of your roofing system from wear and tear.
- Improves Aesthetic Appeal: Creates clean, sharp lines along the roof’s perimeter.
- Meets Building Codes: Many regions mandate drip edge installation for compliance with building regulations.
What is Roofing Underlayment?
Roofing underlayment is a protective layer placed directly onto the roof deck beneath shingles or other roofing materials. It acts as a secondary barrier to shield your home from water infiltration caused by wind-driven rain and ice dams.
| Type | Material | Key Features |
| Asphalt-Saturated Felt | Organic or fiberglass base | Affordable; provides basic protection |
| Synthetic Underlayment | Polymer-based material | Lightweight, durable, water-resistant |
| Rubberized Asphalt | Rubber polymers | Self-sealing; ideal for ice-prone areas |
Why Are Drip Edge and Underlayment Essential?
- The drip edge ensures that water flows directly into gutters while keeping it away from fascia boards and soffits.
- The underlayment provides an extra layer of defense against leaks caused by damaged shingles or severe weather conditions.
- Both elements work together to reinforce your roof’s structural integrity by preventing water infiltration that might weaken its framework over time.
- High-quality underlayments can contribute to better insulation levels, helping maintain indoor temperature stability and reducing energy bills.
- Whether facing heavy rainfall or snow accumulation, proper installation of these materials ensures your home remains protected against harsh environmental factors.
Installation Tips for Drip Edge and Underlayment
- Start by attaching the drip edge along all eaves before placing any underlayment or shingles.
- Overlap sections of drip edge slightly (about 2 inches) to prevent gaps where water could seep through.
- Secure synthetic underlayments with roofing nails or staples at regular intervals for added stability.
- Extend the underlayment beyond roof valleys for extra protection in vulnerable areas.
- Always follow manufacturer guidelines when selecting materials to ensure compatibility with your specific roofing system.
Final Thoughts
Installing drip edge and underlayment is not merely an optional step but an essential part of any successful roofing project. These components safeguard your home against moisture-related issues while contributing to long-term performance and durability. By understanding their purpose and benefits, you can make informed decisions during your next roofing endeavor that protect both your property investment and peace of mind.
How to Choose the Best Minneapolis MN Roofing Contractor for Your Next Project
Selecting the right roofing company is a crucial step in ensuring the longevity, durability, and overall success of your roofing project. Whether you are installing a new roof, replacing an old one, or performing repairs, partnering with a reliable and professional roofing contractor can make all the difference: https://www.minneapolisroofingexperts.com/
Below are some key factors to consider when making your decision.
Research and Gather Recommendations
- Ask for referrals: Begin by asking friends, family, neighbors, or coworkers if they have worked with a reliable roofer in the past. Personal experiences often provide valuable insights.
- Search online reviews: Websites like Google, Yelp, and Better Business Bureau (BBB) offer customer reviews that can help you evaluate potential companies. Look for patterns in feedback such as professionalism, timeliness, and quality of work.
- Check local directories: Local businesses often have a better understanding of area-specific building codes and regulations.
Verify Credentials and Licensing
Ensure that the roofing company you are considering has proper licensing and insurance. This protects both you as the homeowner and their workers during the project:
– Licensing: Confirm that they hold appropriate licenses mandated by your state or region for roofing work. – Insurance: Request proof of liability insurance and workers’ compensation coverage to mitigate risks in case of accidents or property damage.
Evaluate Experience and Expertise
Experience matters when it comes to roofing projects. Look for companies with several years of industry experience:
– Ask how long they’ve been in business. Established companies are more likely to deliver high-quality results.
– Check if they specialize in your specific type of project (e.g., residential roofs vs. commercial roofs).
Ask About Warranty Options
Roofing companies should offer warranties on both materials used during installation as well as their workmanship:
| Warranty Type | What It Covers | Typical Duration | |——————–|—————————————————–|——————| | Manufacturer Warranty | Covers defects or issues with materials provided by manufacturers | 20–50 years | | Workmanship Warranty | Covers installation errors caused by contractors | 1–10 years |
Always read warranty terms carefully to understand what is covered under each policy.
Request Detailed Quotes
Before committing to any company: 1. Obtain written estimates from multiple contractors for comparison. 2. Look beyond price—evaluate timelines, included services (e.g., cleanup), payment schedules, etc. 3. Be wary of unusually low quotes; these may indicate subpar materials or inexperienced workers.
Check References
Reputable roofing companies should be able to provide references from past clients:
1. Contact at least three references provided by the contractor. 2. Ask about their satisfaction with timeline adherence, budget management, communication skills during the project process.
Examine Communication Skills
Clear communication is vital throughout any construction process: – Does the company respond promptly? – Are they patient when answering questions? Good communication ensures everyone involved understands expectations clearly before starting work.
By carefully following these steps while choosing your next roofer guarantees peace-of-mind reliability coupled alongside outstanding results tailored unique-to-your home’s needs.
- Step-By-Step Guide to Choosing the Best Minneapolis MN Roofing Contractor for Your Roof Installation
- Step-by-Step Guide for Beginners from a Trusted Minneapolis Roofer
- Step-by-Step Guide to Roof Installation by a Trusted Minneapolis Roofer
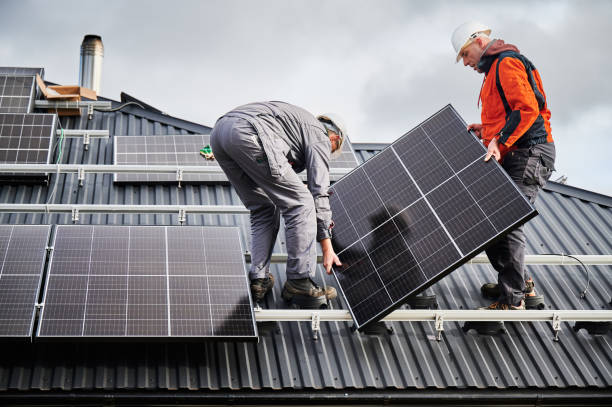
- Essential Tips for Minneapolis MN Roof Replacement with Solar Panels
- What Minneapolis MN Roofing Contractor Experts Want You to Know Before Installing a New Roof
- A Minneapolis Roofer’s Guide to Installing Roof Shingles for Homeowners
- Identifying When to Call a Minneapolis Roofer for Repairs or Replacement
- What Is Included in a Comprehensive Minneapolis MN Roof Replacement Process